 As spring approaches here in Florida so does the increase in the number of Spring Break tourists. As I was driving home from work the past few days, I have noticed an abundance of New York State licence plates, so it is only fitting that today’s post focuses on a treat straight from Brooklyn. Chocolate Blackout Cake originated from Ebinger’s Baking Company, which opened its doors in 1898 on Flatbush Avenue in Brooklyn, New York. Arthur Ebinger, the creator of the first death by chocolate cake, named the confection after blackout drills conducted by the Civilian Defense Corps during World War II. As Navy ships were sent out to sea from the Brooklyn Navy Yard, the streets of Brooklyn were “blacked out” to avoid silhouetting the battleships against the backdrop of Brooklyn and Manhattan. This cake is meant to resemble the blackout as it has dark chocolate layers which tower high to resemble the Manhattan skyline.
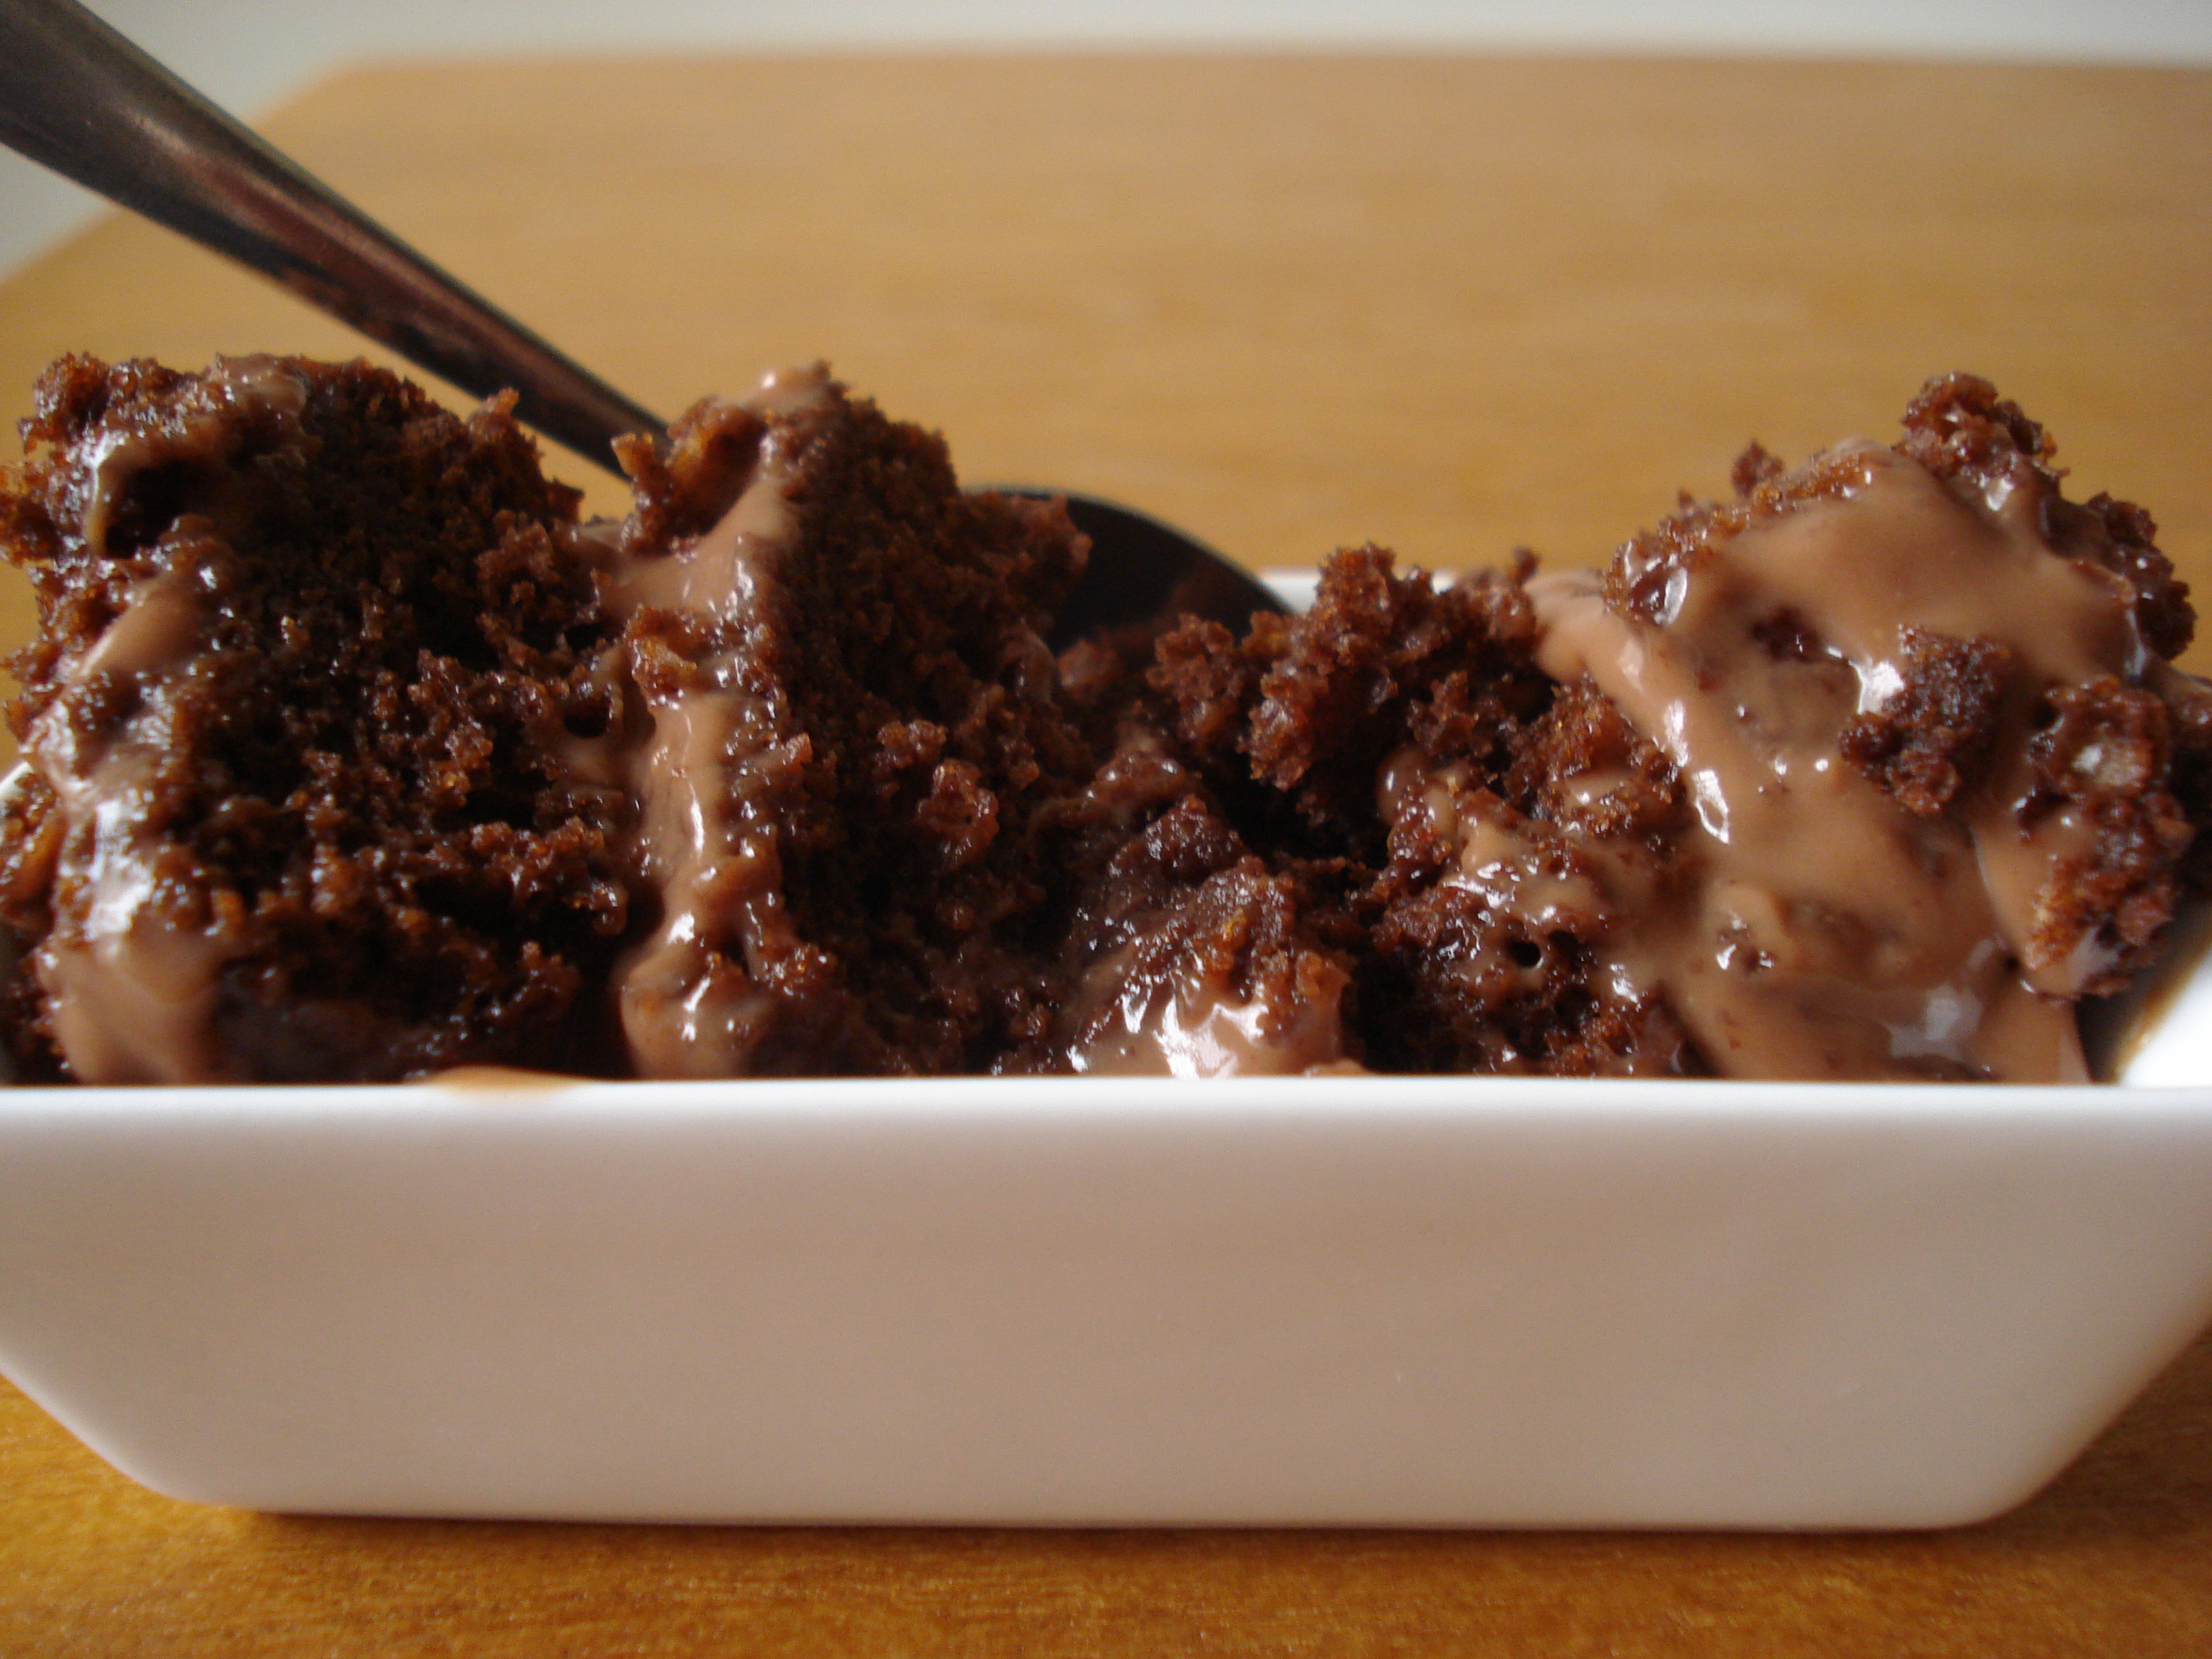 To make the cake layers dark and full of chocolate flavor, there are a few culinary tricks that are simple and totally worth it. Start with cocoa powder, and bloom it with some butter in a pan on the stove. Once bloomed, another culinary secret is added which enhances chocolate flavor… that being coffee. Perhaps the best part of all of this little process is not only am I starting the cake batter on the stove but will also finish it there, making for a quicker process, less dishes to clean later, and no messy transfers between bowls! As for the frosting…err I mean pudding (which is probably my favorite part of this whole cake as I am not a traditional frosting fan) the most important part is to ensure it has a velvety rich chocolate taste but also enough stability to cling to the sides of the cake and adhere the cake crumbs to itself. Using half & half plus milk achieves a satiny quality with a bit of sweetness which helps to prevent an over bitterness which can happen when too much chocolate is on the palate. Once the cake is completely cooled and the pudding chilled and set (be sure you allow enough time or the cake will be gummy and the pudding will run) you can assemble the pastry equivalent of a New York City skyscraper.
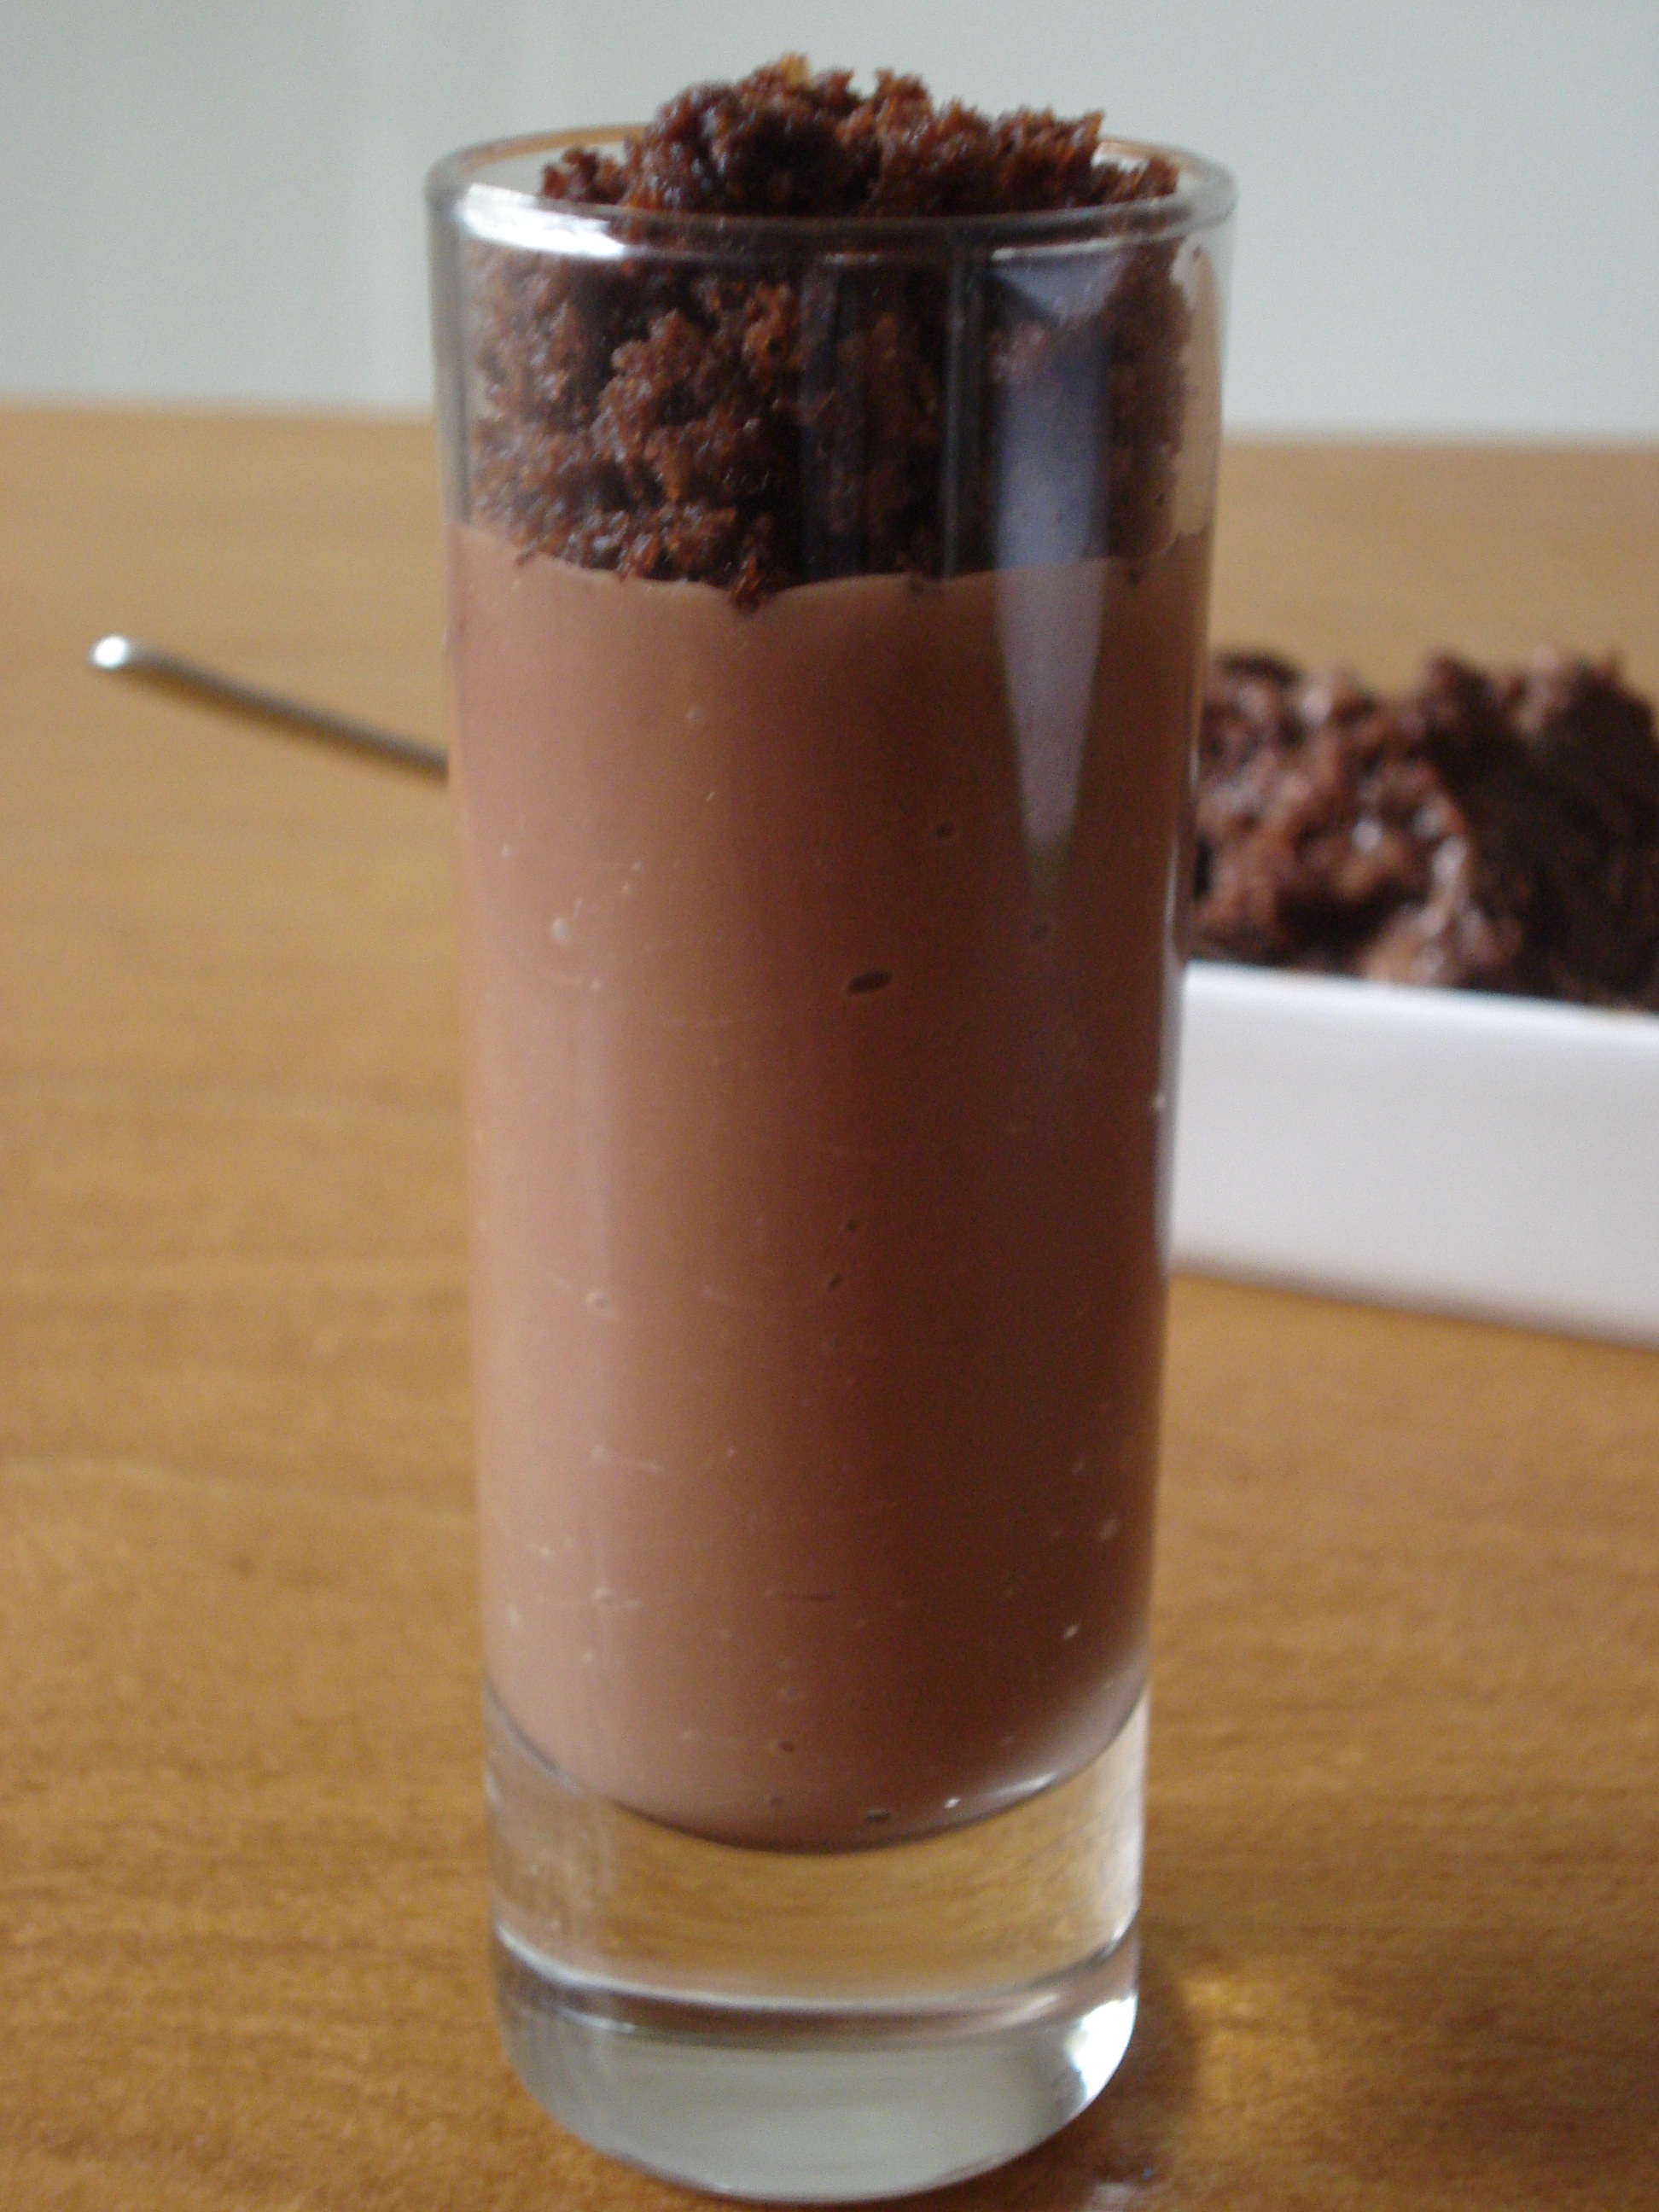 After I assembled my cake, I realized that I had some extra crumbs and a generous amount of pudding. Since we are in the age of going green and I didn’t want to see any product go to waste, I decided to utilize my extra pudding and cake crumbs in a simple yet innovative way, perfect for parties or even dessert for a weeknight dinner. I shall call them, Blackout Parfaits. To make them you will need parfait glasses of your choice. I own the tall and thin variety but short and stumpy or even a shot glass would work just fine. To neatly fill the glasses, I filled a piping bag with the remaining chocolate pudding and piped it into the glass. For the topping, I used some of the extra chocolate cake layer crumbs and sprinkled them over the piped pudding. It’s as simple and quick as that!
Chocolate Blackout Cake
Ingredients:
*Chocolate Pudding*
- 1 ¼ cups Sugar
- ¼ cup Cornstarch
- ½ tsp. Salt
- 2 cups Half & Half
- 1 cup Milk
- 6 oz. Unsweetened Chocolate, chopped
- 2 tsp. Vanilla Extract
*Cake Layers*
- 8 tbsp. (1 stick) Unsalted Butter
- 1 ½ cups All-Purpose Flour
- 2 tsp. Baking Powder
- ½ tsp. Baking Soda
- ¾ cup Cocoa Powder
- 1 cup Coffee, brewed
- 1 cup Buttermilk
- 1 cup Light Brown Sugar
- 1 cup Sugar
- 2 Eggs
- 1 tsp. Vanilla Extract
Formula:
- For the Pudding: Whisk sugar, cornstarch, salt, half & half, and milk in a saucepan set over medium heat. Add chocolate and whisk constantly until chocolate melts and mixture begins to bubble, about 2 to 4 minutes. Stir in vanilla and transfer pudding to a bowl. Place plastic wrap directly on the surface of the pudding and refrigerate until cold, at least 4 hours and up to 1 day.
- For the Cake Layers: Adjust oven rack to the middle position and heat to 325°. Grease two 8 in. cake pans. Whisk flour, baking powder, baking soda, and salt in a bowl. Melt butter in a saucepan over medium heat. Stir in cocoa and cook until fragrant, about 1 minute. Take off the heat and whisk in coffee, buttermilk, and both sugars until fully combined and sugars are dissolved. Whisk in eggs and vanilla, then slowly mix in the flour mixture.
- Divide batter evenly between the prepared pans and bake approximately 30-35 minutes. Cool layers in the pans for 15 minutes, then remove and finish cooling to room temperature on a wire cooling rack for at least 1 hour. To assemble the cake cut each layer in half horizontally. Crumble one cake layer into crumbs and set aside. Place one cake layer on a cardboard round and set on a decorating table. Spread a generous amount of pudding over the first cake layer then top with another cake layer. Repeat with another generous helping of pudding and top with the final cake layer. Spread pudding evenly over the top and sides of the cake. Sprinkle the cake crumbs evenly over the top and sides of the cake and press lightly to adhere the crumbs to the pudding. Serve or store for up to 2 days.

